@ garomesi
A feeder disappears from the list if it already exists, or has been installed in an earlier run of ./install.sh
check if fr24 feeder already exists on your Pi.
-
Thanks Oblivian, ...... works now with http.
Please excuse my following question ...... but it seems that I have now another hurdle to take: The option Flightradar24 doesn't appear:
GaRoMeSi 2.jpg
Whenever you have again a hint, please let me know.
Thanks and regards
RolfLeave a comment:
-
Hi
I just tried to follow the installation instruction. After the command git clone https://github.com/jprochazka/adsb-receiver.git I am asked about a Username for https://github.com and a password. Not sure what I have to enter - so I registered myself @gitbub but the Username and Passwort doesn't work.
Maybe you have a hint what needs to be done.
Thanks in advance.
GaRoMeSi.jpgLeave a comment:
-
I used this, as described, on a fresh install of Raspbian and it worked like a champ.
If you have struggled with installing any of this, your jaw will simply drop.
This is brilliant!Leave a comment:
-
Automated Installation of Dump1090-Mutability, Data Feeders, and Performance Graphs
The automated installation scripts are written by Joe Prochazka.
https://github.com/jprochazka/adsb-receiver
This method will NOT work with an existing installation. It requires a fresh install on a blank formatted microSD Card.
- Format microSD Card
- Download and unzip latest Raspbian operating System from http://raspberrypi.org/downloads/raspbian/
At the time of writing this post, the latest images are "Raspbian Jessie" and "Raspbian Jessie Lite". - Burn the "Raspbian Jessie Lite" or "Raspbian Jessie" image on microSD Card.
- Insert the microSD Card in RPi, and power up.
- SSH to RPi and login
- Give command sudo raspi-config
- Expand File System, change password, set time-zone and set language/keyboard.
- Reboot
- After reboot, SSH and run following commands
Code:sudo apt-get update sudo apt-get install git git clone https://github.com/jprochazka/adsb-receiver.git cd ~/adsb-receiver chmod +x install.sh ./install.sh
- After last command (./install.sh), the automated installation process will start. First thing it will do is to update required packages list.
- Next step it will ask you choices (yes/no) for installing
- dump1090-mutability OR dump1090-fa - Essential. The script will exit immediately if you say "No".
The dump1090-fa is Flightaware's fork of dump1090-mutability. Both versions of dump1090 work ok, but their User Interface on Map Page are somewhat different. Their configuration/settings methods are also different.
Since dump1090-fa is specific to Flightaware, while dump1090-mutability is non site-specific, I prefer to install dump1090-mutability.
- dump978 - Only for USA. Even in USA, this is not much useful and requires 2nd DVB-T Dongle. Most people say "No" to it.
- four data feeders - Flightaware, Planefinder, Flightradar24, and Adsbexchange. You may choose whatever feeders you want. To choose Flightradar24 feeder, use arrow key to move cursor up/down, and when on "Flightradar24 Client", press Spacebar to choose it. A star will be placed to show it is selected.
CAUTION :
When configuring FR24 feeder, DO NOT select "Receiver: DVBT".
If you select "Receiver: DVBT", the FR24 feeder will replace dump1090-mutability ver 1.15~dev by v1.14. This will cause map and graphs to fail.
Set following option:
(1) If configuring by SSH (Putty)
Receiver = ModeS Beast (USB/Network)
Connection Type = Network connection
IP Address / Host: 127.0.0.1
Port: 30005
(2) If configuring in browser at http ://<ip-of-pi>:8754/settings.html
Receiver: ModeS Beast (TCP)
Host/IP: 127.0.0.1:30005
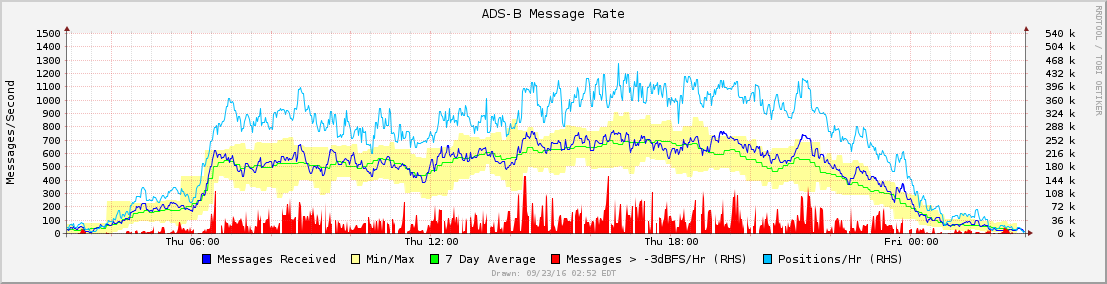
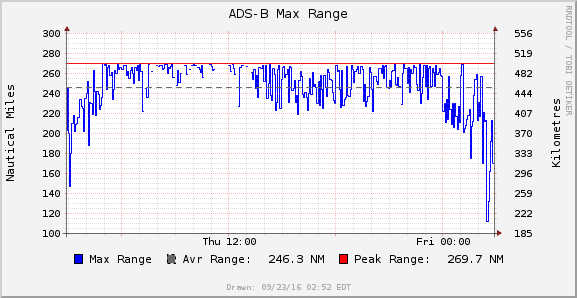
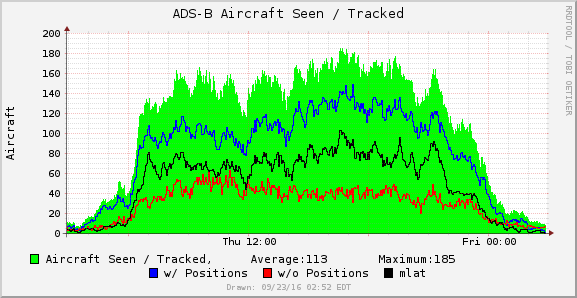
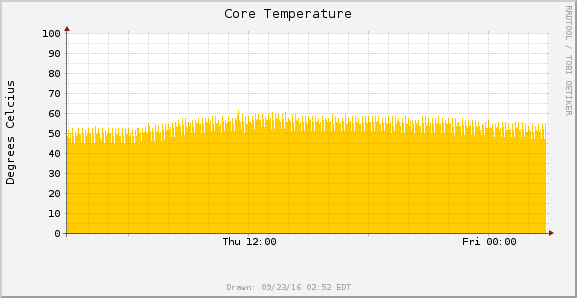
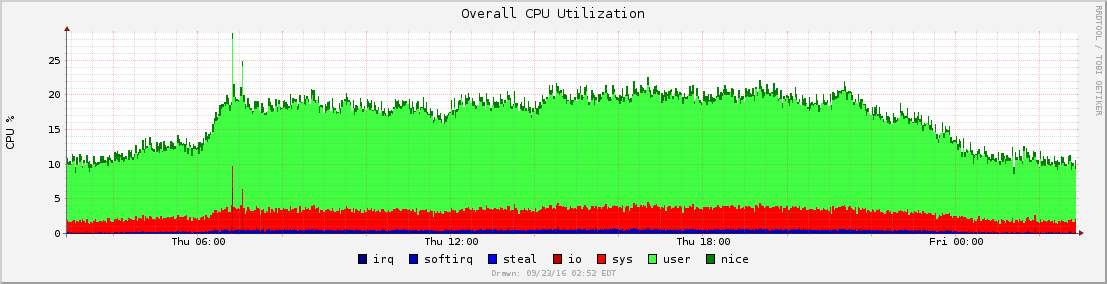
- web portal - a useful tool comprising of many performance graphs. I recommend to say "Yes" to it. When its installation starts, another dialog will open. DO NOT choose ADVANCE OPTION. The advance option installs MySQL database, and will continuously & unnecessarily store all flight data on microSD card, shortening its life severely.
- dump1090-mutability OR dump1090-fa - Essential. The script will exit immediately if you say "No".
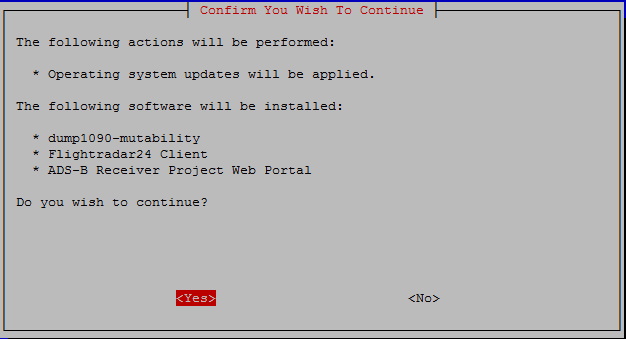
- It will then ask you if you want to proceed. Say "Yes".
- The process will now start updating the operating system, and on completion will tell you "Your operating system should now be up to date".
- It will then ask your permission to install dump1090-mutability. Say "Yes" and it will start build & install process. It is a lengthy process, be patient, go to kitchen and make a coffee for yourself.. At the end it will ask you to enter receiver's latitude and longitude. It has also an option to provide terrain limit rings, if you want and have obtained your heywhatstah.com panorama ID. Upon completion it will say " Dump1090-mutability setup is complete."
- It will then ask your permission to proceed with data feeder installation. For Flightradar24 feeder it will take moderate time, Planefinder feeder will be quick, but Flightaware data feeder takes very very long time. Be patient and make 2 cups of coffee for yourself. After installation is completer, FR24 signup process starts, which will require your credentials (email address, sharing key, latitude, longitude, antenna altitude etc).
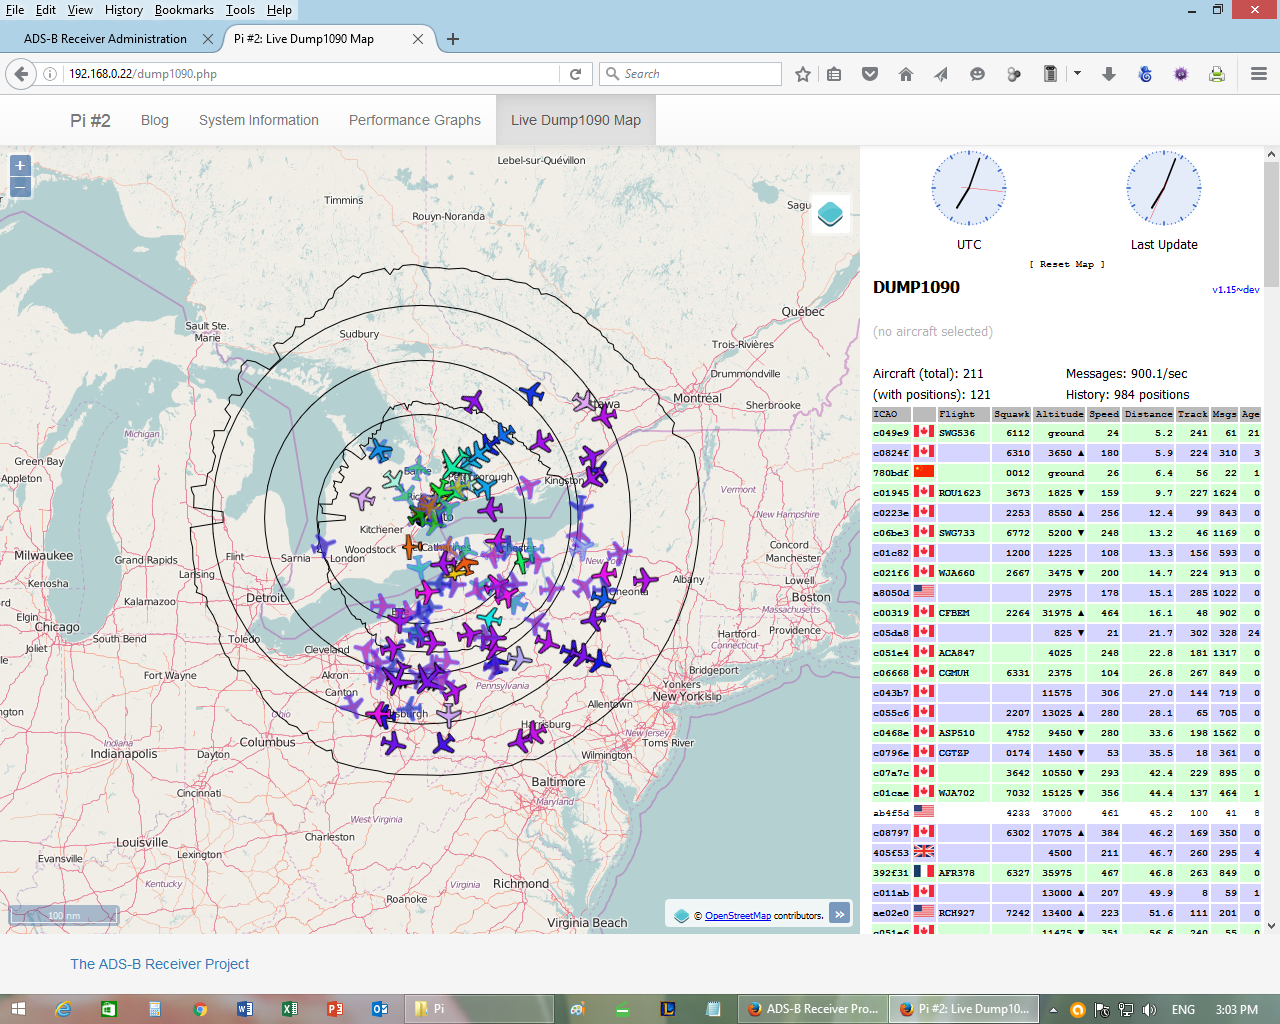
- If you have said "Yes" to Web Portal earlier, its installation will start. It will ask if you want advance options. DO NOT CHOOSE ADVANCE OPTION. When the Web Portal installation finishes it will tell you " ADS-B Receiver Project Portal setup is complete". You then have to configure web portal from your browser.


 Last edited by abcd567; 2018-05-16, 22:42.
Leave a comment: